

As an Amazon Associate, I earn from qualifying purchases at no extra cost to you.
Fixing Charging System Malfunction in a Toyota?
 ByFawaz
To fix charging system malfunction in a Toyota, start by checking the battery connections for any corrosion or loose wiring. Then, inspect the alternator and voltage regulator for any signs of wear or damage.
Ensuring the proper functioning of your Toyota’s charging system is essential for its overall performance and longevity. When dealing with any charging system issues, it’s crucial to address them promptly to avoid potential breakdowns and further damage. By following the recommended maintenance schedule and conducting regular inspections, you can prevent and resolve charging system malfunctions.
This proactive approach will help keep your Toyota in optimal condition and minimize the risk of unexpected breakdowns on the road. If you encounter persistent issues, seeking professional assistance from a certified Toyota technician is advisable to ensure thorough diagnostics and effective repairs.

Credit: www.rav4world.com
Common Signs Of Charging System Malfunction
If your Toyota is experiencing a charging system malfunction, there are several common signs to watch out for. Ignoring these signs can lead to more severe issues down the line.
Warning Lights
When dashboard warning lights related to the charging system, such as the battery or alternator light, appear, it indicates a potential issue.
Dimming Lights
Lights dimming unexpectedly while driving, especially when using electrical components, could signal a problem with the charging system.
Battery Drain
Rapid battery drain even after a recent replacement may indicate an underlying charging system malfunction.

Credit: m.youtube.com
Diagnosing The Problem
When your Toyota experiences charging system malfunctions, it’s crucial to diagnose the issue accurately to ensure that the repair process is efficient. Here are the essential steps to diagnose the problem effectively.
Checking Battery Connections
Loose or corroded battery connections can often be the cause of charging system malfunctions. It’s important to thoroughly examine the battery terminals and cables for any signs of corrosion or looseness. Clean and tighten the connections if necessary to ensure a secure and stable connection.
Testing Battery Voltage
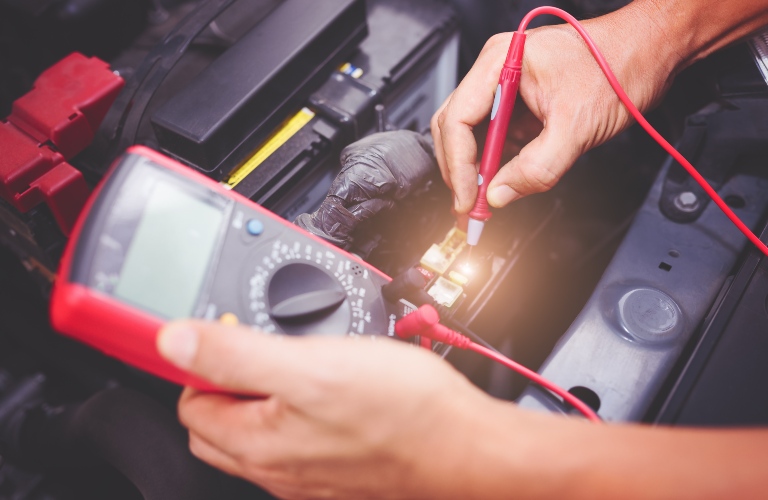
Using a multimeter, you can measure the voltage of the battery. A healthy battery should have a voltage reading of around 12.6 volts. Anything significantly lower might indicate a problem with the battery itself, which could be the root cause of the charging system malfunction.
Inspecting Alternator
The alternator plays a vital role in the charging system. It’s essential to inspect the alternator for any signs of wear or damage. Check the condition of the drive belt and ensure that it is properly tensioned. The alternator’s output should also be tested to verify that it is functioning within the specified range.
Replacing The Alternator
When it comes to fixing a charging system malfunction in your Toyota, one common cause could be a faulty alternator. The alternator is responsible for generating power and charging the battery while the engine is running. If you notice dim lights, battery warning signs, or a struggling engine, it’s time to replace the alternator. This process involves gathering the necessary tools, removing the old alternator, and installing the new one.
Gathering Necessary Tools
Before replacing the alternator, gather the following tools:
- Socket set
- Wrenches
- Screwdrivers
- Pliers
- Wire brush
- Voltmeter
- New alternator
Removing The Old Alternator
To remove the old alternator, follow these steps:
- Disconnect the negative terminal of the battery to prevent any electrical mishaps.
- Locate the alternator, usually close to the engine and attached to brackets.
- Loosen the belt tensioner and remove the serpentine belt from the alternator pulley.
- Disconnect the wiring harness and remove any mounting bolts securing the alternator.
- Remove the old alternator from the vehicle.
Installing The New Alternator
Now, it’s time to install the new alternator:
- Place the new alternator in the correct position and secure it with mounting bolts.
- Reconnect the wiring harness to the new alternator.
- Reinstall the serpentine belt onto the alternator pulley while applying appropriate tension.
- Use a voltmeter to verify that the alternator is functioning properly.
- Finally, reconnect the negative terminal of the battery to restore electrical power.
By following these steps and replacing the old alternator with a new one, you can fix the charging system malfunction in your Toyota. Remember to always consult your vehicle’s manual for specific instructions and safety precautions.
Replacing The Battery
Replacing the battery in your Toyota is an essential part of maintaining its charging system. Over time, the battery can lose its efficiency, leading to charging system malfunctions. When it comes to fixing a charging system malfunction, replacing the battery is often the first step. Here’s how to choose the right battery, remove the old battery, and install the new one.
Choosing The Right Battery
When choosing a new battery for your Toyota, it’s important to select one that meets the manufacturer’s specifications. Refer to your vehicle’s manual for the exact specifications for voltage, size, and cold-cranking amps (CCA). You can also consult with a professional at an auto parts store for assistance in selecting the right battery for your Toyota.
Removing The Old Battery
Before removing the old battery, make sure the engine is turned off. Start by disconnecting the negative terminal cable, followed by the positive terminal cable. Use a wrench to loosen the bolts holding the battery in place and gently lift it out of the compartment. Be careful, as car batteries can be heavy.
Installing The New Battery
When installing the new battery, ensure it is positioned correctly in the compartment. Secure the battery by tightening the bolts and reconnecting the positive terminal cable followed by the negative terminal cable. Make sure the connections are tight and secure to prevent loose connections that can lead to poor charging system performance.
Checking The Belt
Checking the belt of your Toyota’s charging system is an important step in resolving any malfunction. A belt that is loose or damaged can prevent the alternator from effectively charging the battery, leading to electrical issues and potential breakdowns. Here’s how you can inspect and adjust the belt tension to ensure your Toyota’s charging system functions optimally.
Inspecting For Damage
Start by visually inspecting the belt for any signs of wear, cracks, or fraying. Check for any shiny or glossy areas, which indicate excessive wear. Also, look for any visible debris or oil on the belt surface, which can affect its grip on the pulleys. If any damage is detected, the belt should be promptly replaced to prevent further issues with the charging system.
Adjusting The Belt Tension
Proper belt tension is crucial for the charging system to operate efficiently. To check the tension, press down on the belt between the alternator and the crankshaft pulley. The belt should deflect slightly without feeling too loose or too tight. If the tension is incorrect, it can be adjusted by loosening the mounting bolts on the alternator and using a pry bar or wrench to apply pressure and then tightening the bolts once the proper tension is achieved.
Checking Other Components
When you encounter a charging system malfunction in your Toyota, it’s important to conduct a thorough inspection of all related components. By checking other components of the charging system, you can identify and resolve any issues that may be causing the malfunction.
Inspecting Fuses And Relays
One of the first components you should inspect is the fuses and relays. These small devices play a crucial role in controlling the flow of electricity within the charging system. A blown fuse or a faulty relay can lead to a charging system malfunction. To inspect the fuses and relays:
- Locate the fuse box in your Toyota. It is usually located under the dashboard or in the engine compartment.
- Open the fuse box and refer to your vehicle’s manual to identify the fuse or relay associated with the charging system.
- Carefully examine each fuse to check for any signs of damage, such as a broken filament or blackened appearance.
- If a fuse appears to be blown, replace it with a new fuse of the same rating.
- In the case of relays, remove them from their sockets and test them using a multimeter or swap them with a similar relay to see if the problem persists.
Testing Voltage Regulator
Another important component to check is the voltage regulator. The voltage regulator is responsible for controlling the amount of electrical charge flowing into the battery and other electrical components of your Toyota. To test the voltage regulator:
- Start your Toyota and let it idle.
- Using a multimeter, set it to the DC voltage setting.
- Connect the multimeter’s positive lead to the positive terminal of the battery and the negative lead to the negative terminal.
- Observe the multimeter readings. You should see a voltage reading within the specified range for your Toyota’s model.
- If the voltage reading is outside the specified range, it may indicate a faulty voltage regulator that needs to be replaced.
By inspecting the fuses and relays as well as testing the voltage regulator, you can effectively troubleshoot and resolve charging system malfunctions in your Toyota. However, if the issue persists, it’s advisable to seek professional assistance to ensure a proper diagnosis and repair.
Seeking Professional Help
When DIY methods fail to resolve the charging system malfunction in your Toyota, seeking professional help becomes crucial. A trusted mechanic can provide the expertise and specialized tools necessary to diagnose and fix complex electrical issues accurately and efficiently. By finding a reliable automotive technician, you can ensure that your vehicle’s charging system is restored to optimal working condition, providing you with peace of mind and reliable transportation.
When Diy Methods Fail
Despite your best efforts, diagnosing and repairing advanced charging system malfunctions can be challenging without the proper knowledge and equipment. When DIY methods fail to resolve the issue, it’s essential to seek professional assistance to avoid further complications and potential damage to your vehicle’s electrical system.
Finding A Trusted Mechanic
When searching for a trusted mechanic to address your Toyota’s charging system malfunction, consider factors such as experience, certifications, and customer reviews. Look for an automotive service provider with a proven track record of expertise in diagnosing and repairing electrical issues. Additionally, seeking referrals from friends, family, or online automotive communities can help you find a reliable mechanic who can efficiently resolve your vehicle’s charging system problems.
Credit: www.baierltoyota.com
Preventing Future Charging System Malfunctions
Learn how to prevent future charging system malfunctions in your Toyota by addressing issues early on. Regular maintenance and timely repairs can help avoid potential breakdowns and ensure your vehicle’s charging system runs smoothly for years to come. It’s essential to stay proactive in maintaining the health of your car’s charging system to avoid costly repairs in the future.
Regular Maintenance
Taking care of your Toyota's charging system with regular check-ups can prevent future malfunctions.Avoiding Battery Drain
Prevent unnecessary battery drainage by turning off all lights when parked.Using Quality Parts
Invest in quality parts to ensure the longevity and efficiency of your Toyota's charging system.Conclusion
Troubleshooting and resolving charging system issues in a Toyota is crucial. By following these steps, you can diagnose and fix malfunctions effectively. Ensure your vehicle stays in top condition to avoid unexpected breakdowns and costly repairs. Keep your Toyota running smoothly with proper maintenance.
