As an Amazon Associate, I earn from qualifying purchases at no extra cost to you.
How to Add Transmission Fluid Without Dipstick: Hassle-free Techniques
 ByFawaz
To add transmission fluid without a dipstick, you need to locate the fill plug on the transmission, remove it, and use a fluid transfer pump to add fluid until it starts to overflow. Adding transmission fluid is an essential maintenance task that ensures smooth and efficient operation of your vehicle’s transmission system.
However, there may be instances where your vehicle does not have a dipstick to check the fluid levels, making it challenging to know when and how much fluid to add. Whether your vehicle design omits the dipstick or it’s broken, fear not, as there is a solution.
In this guide, we will outline the steps to add transmission fluid without a dipstick, ensuring that you can keep your vehicle running optimally. By following these simple instructions, you can maintain the fluid levels in your transmission system without relying on a dipstick. So, let’s dive in and explore how to add transmission fluid without a dipstick.

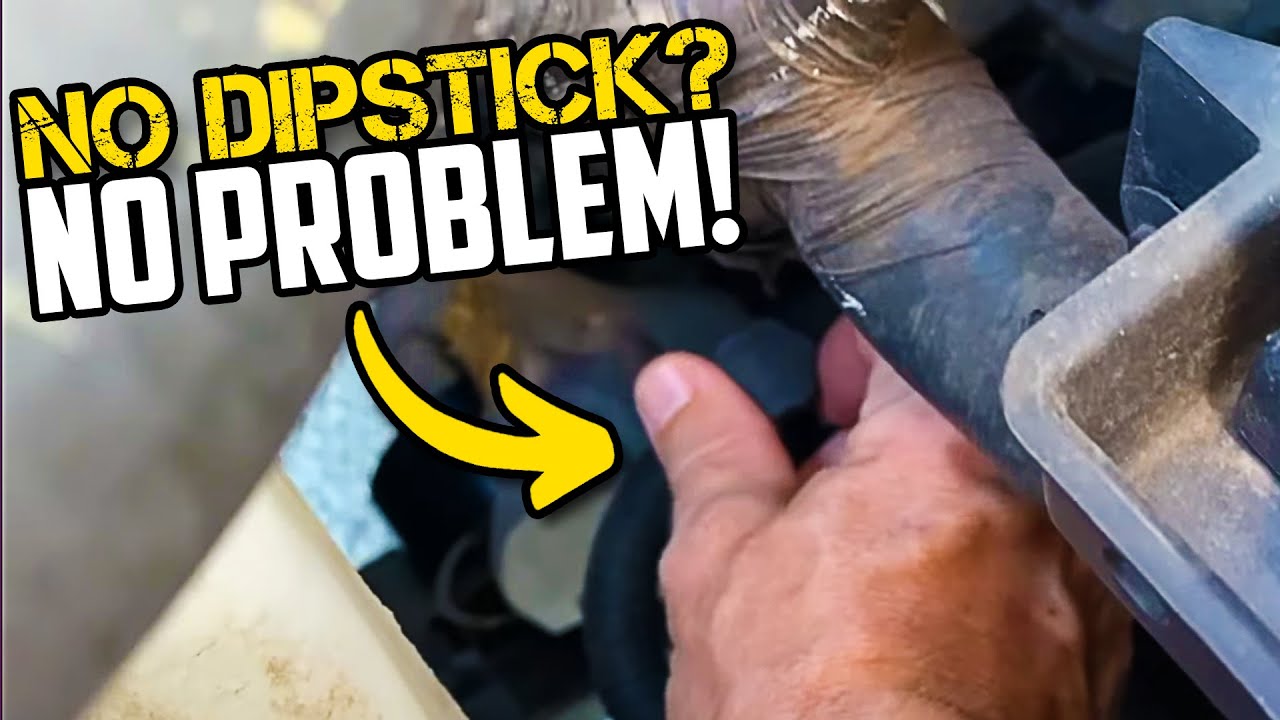
Credit: www.amazon.com
Techniques To Add Transmission Fluid Without Dipstick
Adding transmission fluid without a dipstick can be a challenge, but it’s not impossible. In this section, we will explore three techniques that you can use to add transmission fluid to your vehicle when there is no dipstick available.
Using A Fill Plug
If your vehicle has a fill plug instead of a dipstick, you can still add transmission fluid without any issues. The fill plug is located on the side of the transmission pan and is typically marked with a symbol or labeled as “fill.” Here’s how you can do it:
- Locate the fill plug on the transmission pan.
- Clean the area around the fill plug to prevent any contaminants from entering the transmission.
- Remove the fill plug with the appropriate tool, usually a wrench or socket.
- Using a funnel, carefully pour the transmission fluid into the fill plug opening.
- Monitor the fluid level by periodically checking it with a dipstick or adding fluid until it reaches the appropriate level.
- Replace the fill plug and ensure it is tightened securely.
Using A Transmission Cooler Line
Some vehicles may have a transmission cooler line that can be used to add transmission fluid. Follow these steps to use this technique:
- Locate the transmission cooler line. This is usually a metal tube that runs from the transmission to the radiator.
- Identify the outlet line by referring to your vehicle’s manual or consulting a professional.
- Disconnect the outlet line using the appropriate tools.
- Attach a plastic tubing to the outlet line and direct the other end into a clean container.
- Start the engine and allow the transmission fluid to flow into the container, using the engine’s idle speed to regulate the flow.
- Monitor the fluid level in the transmission and add more fluid if necessary.
- Once the appropriate fluid level is reached, reconnect the outlet line and ensure it is secured tightly.
Using A Transmission Fluid Exchange Machine
If all else fails, you can visit a professional automotive shop that utilizes a transmission fluid exchange machine. This machine is designed to flush out the old transmission fluid and replace it with new fluid. By using this method, you can ensure that your transmission is properly filled with the correct amount of fluid.
Remember, it’s always best to consult your vehicle’s manual or seek professional assistance if you are unsure about adding transmission fluid without a dipstick. Following these techniques will help you maintain the optimal performance and longevity of your transmission.
Credit: m.youtube.com
Step-by-step Guide: Using A Fill Plug
Learn how to add transmission fluid to your vehicle without a dipstick by following these step-by-step instructions using a fill plug. Ensure you carefully adhere to the guidelines provided for a smooth process.
Adding transmission fluid to your vehicle without a dipstick may seem complicated, but with the right steps and guidance, it’s a task you can easily accomplish. In this guide, we’ll cover one method of adding transmission fluid: using a fill plug. This method is commonly found in newer vehicles that don’t have a traditional dipstick. So, let’s dive into the step-by-step process of adding transmission fluid using a fill plug.
Identify The Fill Plug
The first step is identifying the fill plug on your vehicle. The fill plug is a small cap or bolt located on the side or top of the transmission. It is usually labeled or color-coded for easy identification. Refer to your vehicle’s owner’s manual or consult online resources to locate the exact position of the fill plug.
Prepare The Vehicle
Once you’ve identified the fill plug, it’s time to prepare your vehicle for the transmission fluid refill. Here are the steps:
- Make sure your vehicle is on a level surface. This ensures an accurate transmission fluid level.
- Start the engine and let it idle for a few minutes to warm up the transmission fluid.
- Securely engage the parking brake to prevent any unintentional vehicle movement.
- Turn off the engine and open the hood to access the transmission fill plug easily.
Fill The Transmission Fluid
With the vehicle prepared, it’s time to add transmission fluid using the fill plug. Follow these steps:
- Using the appropriate wrench or socket, carefully remove the fill plug. Be cautious not to damage the plug or the surrounding area.
- Locate the transmission fluid pump or a suitable fluid transfer tool. These tools are available at most auto parts stores.
- Insert the pump or transfer tool into the fill plug hole and begin adding small amounts of transmission fluid.
- Keep adding fluid until it starts to overflow slightly from the fill plug hole.
- Replace the fill plug and tighten it securely with the wrench or socket.
And there you have it! You’ve successfully added transmission fluid to your vehicle without a dipstick using the fill plug method. Remember to consult your vehicle’s owner’s manual for specific recommendations on the type and quantity of transmission fluid to use. Regularly checking and maintaining proper transmission fluid levels will help keep your vehicle running smoothly and prolong its lifespan.
Step-by-step Guide: Using A Transmission Cooler Line
Learn how to add transmission fluid without a dipstick by following our step-by-step guide on using a transmission cooler line. This easy-to-follow tutorial provides all the necessary instructions for a hassle-free process.
Adding transmission fluid to your vehicle is essential for maintaining its performance and prolonging its lifespan. But what if your car doesn’t have a dipstick to check and add transmission fluid? Don’t worry, you can still get the job done by using a transmission cooler line. In this step-by-step guide, we’ll show you how to locate the transmission cooler line, prepare your vehicle, and fill the transmission fluid smoothly.
Locate The Transmission Cooler Line
The transmission cooler line is a crucial component that cools down the transmission fluid, preventing it from overheating. To add transmission fluid without a dipstick, you need to locate this line before proceeding any further. Follow the steps below:
- Consult your vehicle’s owner manual to identify the location of the transmission cooler line. Different vehicles may have different configurations, so it’s important to refer to the specific information for your make and model.
- Once you have located the cooler line, which is usually made of metal or rubber, double-check its position to ensure correct identification.
- Take note of any clamps or brackets that may be securing the cooler line. You may need to detach or adjust them to access the line.
Prepare The Vehicle
Proper preparation is necessary to ensure a smooth and efficient process when adding transmission fluid without a dipstick. Follow these steps to get your vehicle ready:
- Make sure your vehicle is parked on a level surface. This ensures an accurate fluid level reading and prevents any accidental rollbacks.
- Start your engine and let it run for a few minutes to warm up the transmission fluid. Warm fluid flows more smoothly and allows for a more accurate level measurement.
- Shift the transmission through each gear position, pausing briefly in each one. This helps to circulate the fluid throughout the transmission system.
- Bring the vehicle back to park and shut off the engine when you have completed the shifting process.
Fill The Transmission Fluid
Now that your vehicle is prepared and the transmission cooler line is located, it’s time to fill the transmission fluid. Follow these steps:
- Using a wrench or pliers, carefully disconnect the cooler line from the transmission. Be cautious as some residual fluid may flow out.
- Secure a suitable container directly beneath the disengaged cooler line to catch the fluid that will flow out.
- Start the engine and allow the transmission fluid to drain into the container. It’s essential to have someone monitoring the flow to ensure the fluid level does not overflow the container.
- While the fluid is draining, gradually add new transmission fluid to the transmission filler tube. Refer to your vehicle’s owner manual to determine the appropriate transmission fluid type and capacity.
- Monitor the fluid level in the container and keep adding new fluid until it matches the amount that has drained out.
- Once the fluid level aligns with the amount that drained out, reattach the cooler line to the transmission and secure it tightly.
Congratulations! You have successfully added transmission fluid without a dipstick by utilizing the transmission cooler line. Remember to check the fluid level regularly and perform any necessary maintenance to keep your vehicle running smoothly.
Step-by-step Guide: Using A Transmission Fluid Exchange Machine
Adding transmission fluid without a dipstick may seem like a daunting task, but with the right equipment and a clear understanding of the process, it can be done smoothly. In this step-by-step guide, we will walk you through the process of using a transmission fluid exchange machine to add fluid to your vehicle. By following these simple instructions, you can ensure that your transmission is running smoothly and efficiently.
Understand The Process
Before you begin, it’s important to have a clear understanding of the process of adding transmission fluid using a fluid exchange machine. This machine is designed to remove the old, contaminated fluid from your transmission and replace it with fresh fluid. Unlike traditional methods that use a dipstick, this process is more precise and efficient.
Prepare The Vehicle
Before you start the fluid exchange, it’s crucial to prepare your vehicle properly. Here are the steps you need to follow:
- Park your vehicle on a level surface and engage the emergency brake.
- Locate the transmission fluid cooler lines and disconnect them from the transmission.
- Connect the machine’s hoses to the disconnected cooler lines.
- Make sure the fluid exchange machine is properly set up and positioned.
Perform The Fluid Exchange
Now that you’ve prepared your vehicle, it’s time to perform the actual fluid exchange using the transmission fluid exchange machine. Follow these steps:
- Start the engine and let it warm up to ensure proper circulation of the fluid.
- Turn on the machine and set it to the desired fluid exchange mode.
- Allow the machine to pump out the old fluid while simultaneously adding fresh fluid.
- Monitor the fluid level and ensure it reaches the recommended level on the machine’s gauge.
- Once the fluid exchange is complete, turn off the machine and disconnect the hoses from the cooler lines.
- Reconnect the cooler lines to the transmission, ensuring a secure connection.
By following these step-by-step instructions, you can successfully add transmission fluid without a dipstick using a transmission fluid exchange machine. Remember to always consult your vehicle’s owner manual for specific instructions and recommendations. Regular transmission fluid maintenance is essential to keep your vehicle running smoothly and extend its lifespan. Don’t forget to schedule regular fluid exchanges to ensure optimal performance and longevity of your transmission.

Credit: www.dubizzle.com
Frequently Asked Questions On How To Add Transmission Fluid Without Dipstick
How Do You Check Transmission Fluid If There Is No Dipstick?
If your vehicle doesn’t have a dipstick, checking the transmission fluid can be a bit more challenging. One option is to consult the owner’s manual for specific instructions. Another option is to take your vehicle to a professional mechanic who can check and refill the transmission fluid if needed.
Can You Add Transmission Fluid To A Sealed Transmission?
No, you cannot add transmission fluid to a sealed transmission. Sealed transmissions are not designed to be serviced or have fluid added. It is important to follow the manufacturer’s guidelines for maintenance and servicing of your vehicle’s transmission.
Can You Add Transmission Fluid While Car Is Running?
Yes, you can add transmission fluid to your car while it is running.
Can You Drive A Car Without A Transmission Dipstick?
Yes, you can still drive a car without a transmission dipstick. It is not necessary for the car to function properly.
How Can I Add Transmission Fluid Without A Dipstick?
To add transmission fluid without a dipstick, you can use the fill plug on the transmission housing to check the fluid level and add fluid as needed.
What Are The Signs That My Transmission Fluid Is Low?
If you notice slipping gears, difficulty shifting, or a burning smell, it may indicate low transmission fluid levels.
Can I Use Any Type Of Transmission Fluid?
No, it is important to use the specific type of transmission fluid recommended by the manufacturer of your vehicle for optimal performance.
How Often Should I Check My Transmission Fluid?
It is recommended to check your transmission fluid regularly, at least once a month, to ensure it is at the proper level.
Conclusion
Adding transmission fluid without a dipstick may seem like a daunting task, but with the right steps, it can be easily accomplished. By following the guidelines provided in this blog post, you can ensure that your transmission fluid is at the appropriate level for optimal performance.
Remember to always consult your vehicle’s manual and seek professional help if needed. With these tips, you can confidently maintain your transmission and keep your vehicle running smoothly.