

As an Amazon Associate, I earn from qualifying purchases at no extra cost to you.
How to Deal With Oil Leaking on the Exhaust Manifold: Quick Steps
 ByFawaz
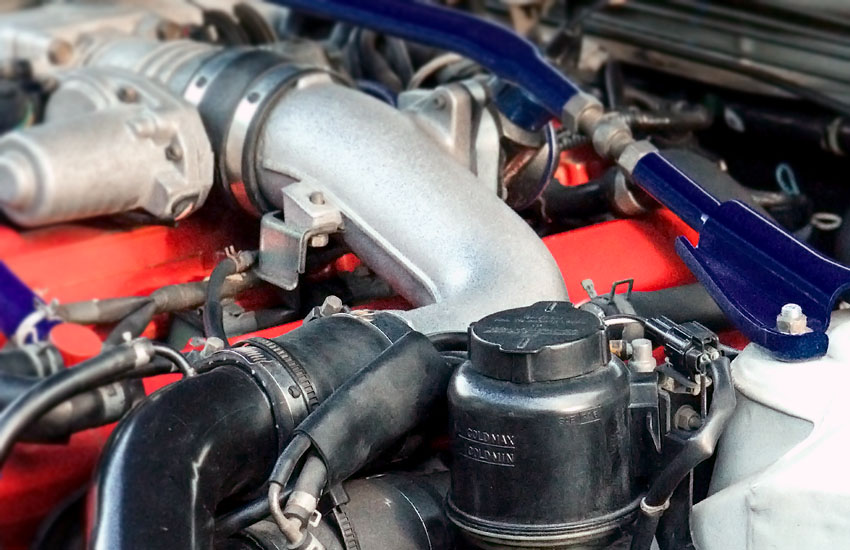
Oil leaks can be a serious problem for your engine, especially when they land on the exhaust manifold. This can lead to dangerous situations, such as fire risks or poor engine performance. If you’re dealing with an oil leak on your exhaust manifold, don’t panic! In this article, we'll walk you through everything you need to know, from identifying the issue to fixing it properly. With some patience and the right tools, you can get your vehicle back to running safely in no time.
Identifying the Cause of the Oil Leak on the Exhaust Manifold
When you spot oil leaking on your exhaust manifold, the first thing to do is try to understand where it’s coming from. Identifying the root cause is crucial before attempting any repairs. Many people may assume the exhaust manifold is directly leaking oil, but in reality, oil tends to leak from other areas, then drip down onto the manifold.
One of the most common reasons oil leaks near the exhaust manifold is a faulty valve cover gasket. The valve cover gasket is responsible for sealing the top of the engine, preventing oil from leaking out of the valve cover. Over time, this gasket can wear down, crack, or become loose, causing oil to leak out. The oil drips down from the valve cover, and if the leak is near the exhaust manifold, it can easily land on it.
Another possibility is a leaking oil line or oil filter. The oil lines carry oil from the oil pump to the engine, and if any of these lines become cracked or disconnected, they can leak oil directly onto the exhaust manifold. Similarly, a loose or damaged oil filter can lead to oil seeping out, which will eventually find its way to the manifold.
It's also important to consider other seals and gaskets in the engine. A bad head gasket, for example, can allow oil to leak into the combustion chamber and onto the exhaust manifold. This type of leak may be more difficult to identify since it could be coming from within the engine itself, but it's still a possibility.
To identify where the leak is coming from, you may need to use some basic tools, like a flashlight or mirror, to get a closer look at the area where the oil is leaking. Sometimes, it helps to clean the area first with a degreaser to get rid of old oil stains and make it easier to spot the fresh leak.
Once you've identified the source of the leak, you'll have a better idea of what kind of repair is needed. In the next section, we'll go over the steps you'll need to take to fix the leak properly.
Fixing the Oil Leak on the Exhaust Manifold
Once you’ve identified the cause of the oil leak, it’s time to fix the issue. Fixing an oil leak on the exhaust manifold involves several steps, depending on the source of the leak. Here's a general guide on how to approach the repair.
Step 1: Safety First
Before starting any repair work, make sure to take proper safety precautions. Always wear gloves and safety glasses to protect yourself from oils and chemicals. Also, disconnect the car battery to avoid any electrical accidents while working near the engine. You'll also want to make sure the engine is cool, as working on a hot engine can be dangerous.
Step 2: Clean the Area
Before inspecting and fixing the leak, it's important to clean the affected area. Use a degreaser or engine cleaner to clean off any old oil, dirt, and debris from around the exhaust manifold and surrounding parts. A clean surface will make it easier to pinpoint the exact location of the leak and will help you make repairs more efficiently.
If the leak is coming from the valve cover gasket or another visible part, cleaning the area thoroughly will give you a better view of the damage. If the leak is coming from a part that's hard to reach, you may need to use a mirror or small camera to inspect the area more closely.
Step 3: Inspect the Valve Cover Gasket
If you suspect the leak is coming from the valve cover gasket, you'll need to inspect it closely. The valve cover is located on the top of the engine, and removing it can be relatively simple if you follow the right steps. First, remove any components that are blocking access to the valve cover, such as air intake pipes, ignition coils, or spark plugs.
Once you have access to the valve cover, unscrew the bolts and gently remove the cover. Be careful not to damage the gasket or any other components. Inspect the gasket for any signs of cracks, wear, or tears. If you find any damage, the gasket will need to be replaced. You can buy a replacement gasket from an auto parts store, and it's often a simple matter of placing the new gasket in position and reattaching the valve cover.
Step 4: Inspect the Oil Lines and Oil Filter
If the valve cover gasket seems fine, the next step is to check the oil lines and oil filter. Look for any visible cracks or leaks in the oil lines, which carry oil to and from the engine. If you spot any cracks or signs of damage, you'll need to replace the oil line.
Similarly, inspect the oil filter. A loose or damaged oil filter can cause oil to leak out. If the oil filter is loose, simply tighten it. If it’s damaged, you'll need to replace it. Make sure to use the correct size and type of oil filter for your car's make and model.
Step 5: Replace the Gasket or Seals
If you've identified the leak as coming from the valve cover gasket or any other gasket, you'll need to replace it. Start by removing the old gasket and cleaning the surfaces where it was seated. Make sure there's no old gasket material left behind, as this can prevent the new gasket from sealing properly.
Once the surface is clean, install the new gasket by carefully placing it in position. Then, reattach the valve cover or other component. Be sure to tighten the bolts evenly to avoid damaging the gasket or creating a leak elsewhere.
Step 6: Test the Repair
After replacing the gasket or fixing any damaged parts, it's time to test the repair. Reconnect the battery, start the engine, and let it run for a few minutes. While the engine is running, check the repaired area for any signs of oil leakage. If the leak persists, you may need to go over the repair process again to ensure everything is properly sealed.
If the oil leak is gone, you've successfully fixed the issue! Now, you can enjoy the peace of mind that comes with knowing your engine is free of leaks.
Step 7: Regular Maintenance
To prevent oil leaks in the future, it’s important to stay on top of regular engine maintenance. Regularly check your oil levels, inspect the valve cover gasket, and replace seals and gaskets as needed. By taking care of your engine and staying on top of minor issues, you can avoid more serious leaks down the road.
I hope this article helped you understand how to deal with oil leaking on the exhaust manifold! Fixing oil leaks can seem tricky at first, but with the right tools and knowledge, it's something you can handle. Take your time, follow the steps carefully, and you’ll get your engine back to normal in no time.
Frequently Asked Questions
Is it dangerous if oil leaks on the exhaust manifold?
Yes, an oil leak on the exhaust manifold can be dangerous. It can lead to fires, poor engine performance, or increased emissions. It’s important to fix the issue promptly.
Can I drive with an oil leak on the exhaust manifold?
It's not recommended to drive with an oil leak on the exhaust manifold. The leak can cause fires or further damage to the engine, so it's best to fix it as soon as possible.
Do I need professional help to fix an oil leak on the exhaust manifold?
It depends on your level of experience with car repairs. If you’re comfortable working with engines and have the right tools, you can fix it yourself. Otherwise, it's a good idea to get professional help.
Is there a quick fix for oil leaking on the exhaust manifold?
While there are temporary solutions, such as using sealants or adhesives, it’s always best to replace damaged gaskets or seals for a proper and long-lasting repair.
Can oil leaking on the exhaust manifold cause engine damage?
Yes, an oil leak can cause long-term engine damage if left untreated. The oil could damage other parts of the engine, or the leak could lead to overheating or poor engine performance.
Is there a way to prevent oil leaks in the future?
Regular maintenance, such as checking gaskets, seals, and oil lines, can help prevent oil leaks. Also, keeping an eye on oil levels and replacing parts as needed can reduce the risk of leaks.
Do I need to replace the entire exhaust manifold if it's leaking oil?
Usually, you don't need to replace the exhaust manifold itself unless it's cracked or severely damaged. Most leaks can be fixed by replacing gaskets, seals, or other parts around the manifold.
Can a leaking oil filter cause oil to leak on the exhaust manifold?
Yes, a leaking oil filter can cause oil to spill onto the exhaust manifold. If the filter is loose or damaged, it can cause oil to leak out, leading to a dangerous situation.
